Hosting Your Website on AWS S3
Introduction
For the purposes of this blog post we will assume that we want to serve some static content from view.spreadviz.org.
It will come in the form of a so-called Single Page Application (SPA), written in a frameworks such as React or Reagent, and compiled to JS digestible by browsers.
We will host it on S3, set it up with SLL and use caching powered by the AWS edge servers (CloudFront). Finally I will show you how to deploy new versions of the page, while invalidating the cache.
Create S3 buckets
We start by creating two S3 buckets, one for the root (sub)domain view.spreadviz.org and one for the www subdomain.
Navigate to AWS console for the S3 service. Create two buckets:
- One called
view.spreadviz.org - One called
www. view.spreadviz.org
–
NOTE
Bucket names do not need to be the same as your domain names, but it will be easier for you to identify them if you stick to that convention.
–
Configure buckets for website hosting
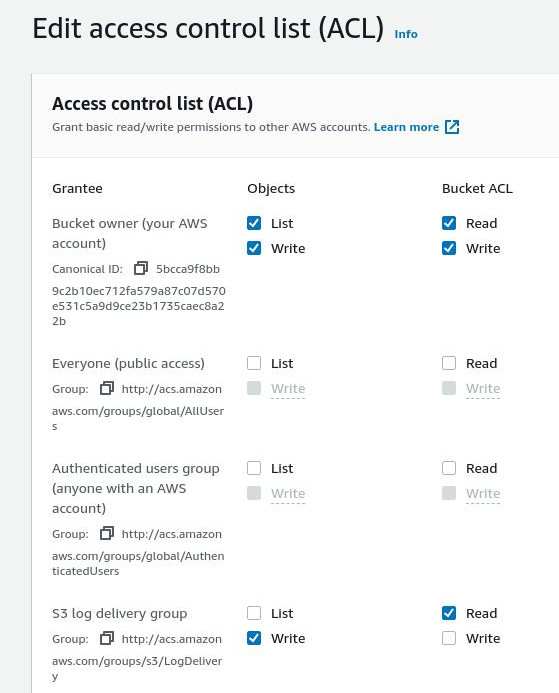
Set access control to PublicRead.

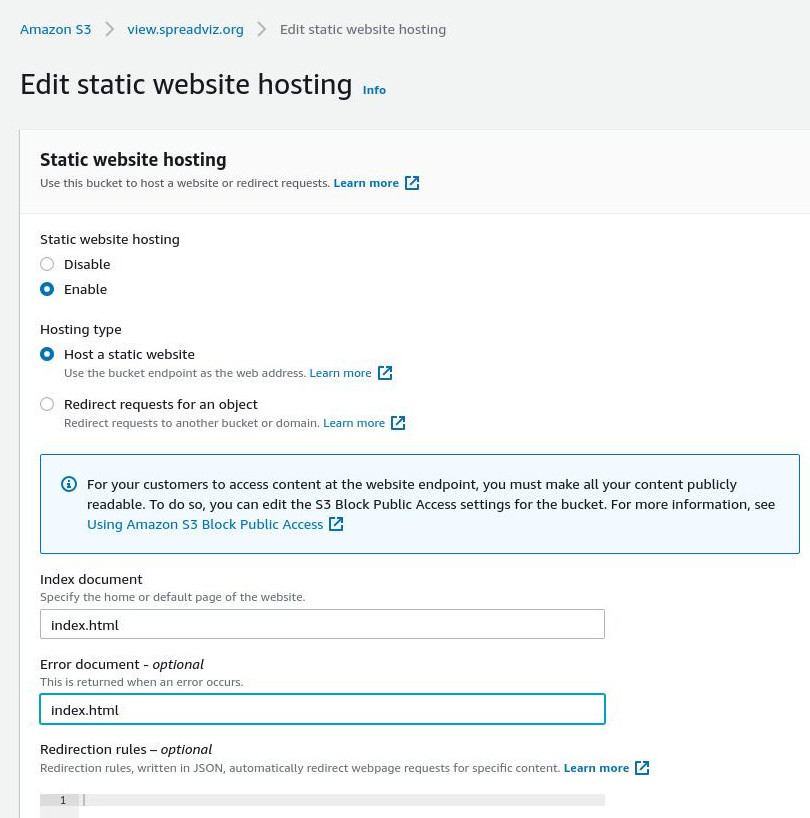
Go to the Properties tab of the view.spreadviz.org bucket and enable “Static website hosting”.
Specify “index.html” as both the index and the error document - reason being that in an SPA we want to serve the same content regardless of the request.
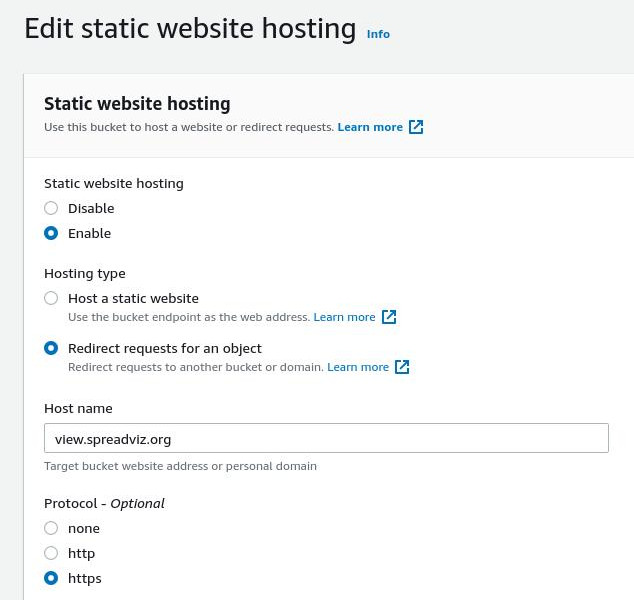
Now for the second bucket called www. view.spreadviz.org set it’s access control to BucketOwnerFullControl or alternatively (if you intend on logging access set it to LogDeliveryWrite).
In the Properties tab of the second bucket also set up website hosting, but this time set it to redirect to the root domain view.spreadviz.org.
Great, now we will create a CloudFront distribution for the content.
Create a CloudFront distribution
Navigate to the AWS console for the CloudFront service.
Set view.spreadviz.org.s3-website.us-east-2.amazonaws.com (the S3 bucket website endpoint) as the Origin Domain Name, (do NOT use the autocomplete to select it!).
In the Viewer protocol policy select Redirect HTTP to HTTPS.
Under Alternate domain name (CNAME) put two names:
view.spreadviz.orgwww. view.spreadviz.org
As a Custom SSL certificate you need to select an ACM certificate created in the us-east-1 region and which is issued for all the domain names you have put there (so both view.spreadviz.org and www. view.spreadviz.org).
If you don’t have a certificate you can request it here.
–
NOTE
You can use an asterisk to cover all subdomain names in your SSL certificate : *.spreadviz.org.
–
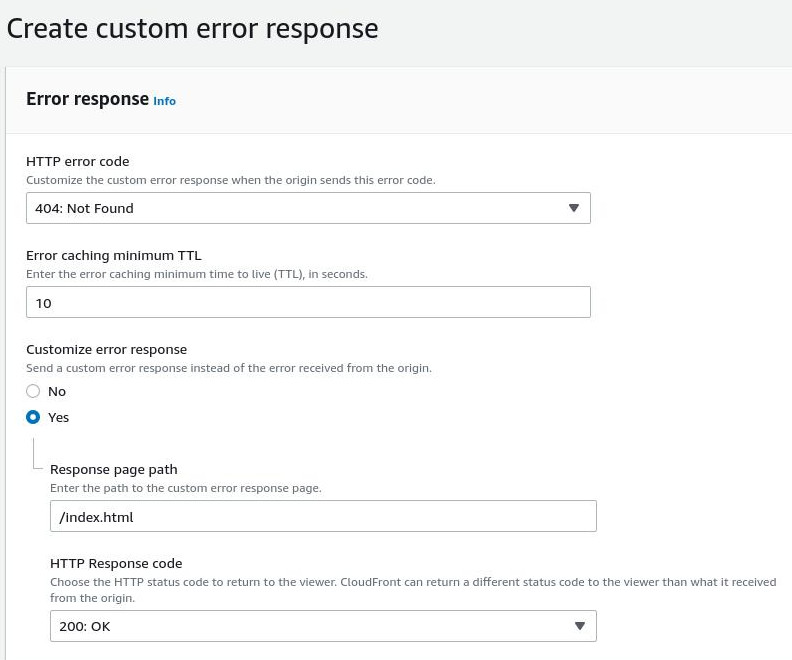
There is one more thing we need to tweak. Our bucket is configured to always serve index.html, even in the case of an error. However, when it cannot find a given route, e.g. when someone navigates to a route of your SPA, it will serve it with an error code of 404 - confusing for browser and crawlers.
To prevent that from happening we need to set up a custom rule, that changes the response to a 200 (OK) in such cases. This can be done from the Error pages tab, by setting the Response Page Path to /index.html with a Response Code of 200.
Direct your domain to the CloudFront distribution
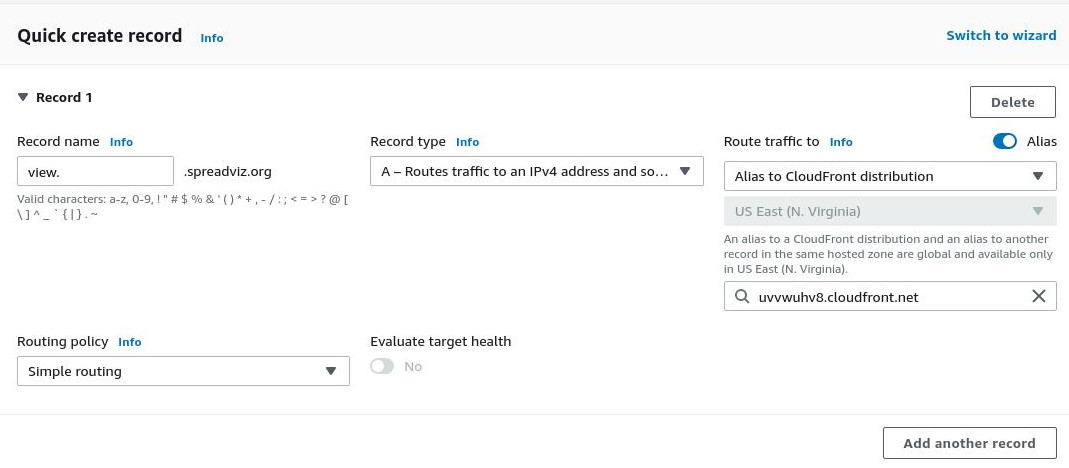
Perfect, now we can finally set up DNS in route53. We will create two records there, both pointing to the CF distribution we just created
view.spreadviz.org, an A alias to the CF distribution’s domain name.www. view.spreadviz.org, which does the same.
Uploading your content to S3
We haven’t actually created any content to serve from the bucket. Assuming the entire compiled output is in analysis-viewer/ directory you can use the AWS CLI tool to upload or sync it:
aws s3 sync analysis-viewer/ s3://view.spreadviz.org --acl public-read
Invalidating CloudFront cache
Likely you will want to update your SPA at some point. To have it reflected in the clients you will need to clear the cache. You can conveniently do it with an API call that create such an invalidation:
aws cloudfront create-invalidation --distribution-id <DISTRIBUTION_ID> --paths '/*'
Note that here I lazily invalidate all the content Invalidation’s are free up to 1000 paths per month - but you could choose to e.g. invalidate the js/*, or even have your CI server configured to decide what to invalidate, thus keeping the costs down a bit if you make frequent updates.
Once the invalidation request completes you will be able to see the updated version of your page in the browser.