Tracking eye centers location with Rust & OpenCV
Intro
Ever since finding OpenCV Rust bindings I’ve been looking for a good project to try it out. Than a friend sparked my curiosity when talking about gesture recognition project he was implementing.
This inspired me to create a tool which can read frames from the camera, track eye movements and translate them to mouse cursor movements. I reckoned Rust is a good fit for writing performant, numerical code. First step would be to implement an algorithm responsible for tracking the location of eye center in a frame (the pupil), and this blog post is dedicated to describing one possible approach.
I started researching the subject and quickly found that the current state-of-the art is described in Timm and Barth, 2011 - I highly recommend reading the paper. A bit more searching revealed that trishume did all the hard work of implementing the algorithm in C++ using OpenCV. Armed with this reference implementation and the original paper I could easily port it to Rust.
Details of the algorithm
The algorithm described in the paper, which I will colloquially refer to as Timm-Barth, aims at finding a centre of a circular object. It does so by optimizing (finding a maximum) of an objective function, which is a (weighted) sum of dot products of two vectors:
- the normalized gradient vector \(\mathbf{g}_{i}\) at pixel position \(\mathbf{x}_{i},\:i \in \{1,\dots, N\}\) such that \(\forall i:\:\left \| \mathbf{g}_{i} \right \|=\mathbf{1}\) and
- the displacement vector \(\mathbf{d}_{i}=\frac{\mathbf{x}_{i}-\mathbf{c}}{\left \| \mathbf{x}_{i}-\mathbf{c} \right \|_2 }\) where \(\mathbf{c}\) is a possible center.
Formally:
\[c^{*}= \underset{c}{\text{arg max}} \left \{ \frac{1}{N} \sum_{i=1}^{N}w_{c}\left ( \mathbf{d}_{i}^T\mathbf{g}_{i} \right )^2 \right \}\]The weights \(\mathbf{w}_c\) are a way of incorporating prior knowledge: since the pupil is darker than the sclera or facial skin, darker pixels are more likely to be the centers. If we consider that $I^*$ is the (smoothed and in a greyscale, as per paper’s suggestion) input frame, than at pixel with coordinates \((c_x, c_y)\) we have that: \(\mathbf{w}_c=I^*\left ( 255-c_x,255-c_y \right )\).
Computing image gradients
An image gradient is a directional change in the or color intensity of the image. At each pixel point of the frame, the gradient is a vector that points in the direction of the largest intensity increase, and the length of this vector corresponds to the rate of the change.
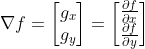
More formally the gradient of a two variable function \(f(x,y):\mathbb{R}^2\rightarrow \mathbb{R}\) is defined as a vector of partial derivatives of that function in each direction:
Since the intensity function of a digital image is known only at discrete points, derivatives of this function cannot be defined, unless we assume some known, differentiable function which has been sampled at these points.
This is why typically the derivative of an image is approximated using finite differences The implementation by trishume implements a procedure where for inner rows of a given frame \(I\) which calculates the gradient for inner rows as a central difference.
\[\frac{\partial I(i,j))}{\partial x}=\frac{1}{2}\left ( \left ( I(i,j+1) - I(i,j) \right ) + \left ( I(i+1,j) - I(i+1,j+1) \right )\right )\]and in direction \(y\):
\[\frac{\partial I(i,j))}{\partial y}=\frac{1}{2}\left ( \left ( I(i+1,j) - I(i,j) \right ) + \left ( I(i+1,j+1) - I(i+1,j+1) \right )\right )\]For the edge rows the gradient value is the difference between the value and the adjacent position.
Implementation
I decided to deviate a bit from the reference implementation. Similar to what the paper describes I start by detecting the face region using framework descibed by Viola and Jones, 2004:
let face_detector_name : &str = "/opt/opencv/opencv-4.2.0/data/haarcascades/haarcascade_frontalface_alt.xml";
let camera_window_name = "camera";

highgui::named_window(camera_window_name, highgui::WINDOW_AUTOSIZE)?;

let face_features = core::find_file(face_detector_name, true, false)?,
let mut face_model : objdetect::CascadeClassifier = objdetect::CascadeClassifier::new(&face_features)?;

let mut frame = Mat::default()?;
cam.read(&mut frame)?;

face_model.detect_multi_scale(
    &frame, // input image
    &mut faces, // output : vector of rects
    1.1, // scaleFactor: The classifier will try to upscale and downscale the image by this factor
    2, // minNumNeighbors: How many true-positive neighbor rectangles do you want to assure before predicting a region as a face? The higher this face, the lower the chance of detecting a non-face as face, but also lower the chance of detecting a face as face.
    objdetect::CASCADE_SCALE_IMAGE,
    core::Size {
            width: 150,
            height: 150
    }, // min_size. Objects smaller than that are ignored (poor quality webcam is 640 x 480, so that should do it)
    core::Size {
            width: 0,
            height: 0
    } // max_size
  )?;
The article posits selecting the eye regions as fractions of the face region. I opted for using viola-jones algorithm again, but this time with a model trained to detect eyes in the face region:
if faces.len () > 0 {
  // region of interest (submatrix), first detected face
  let face_region = Mat::roi (&enhanced_frame, faces.get (0)?)?;
  let face = faces.get (0)?;
  // calls viola-jones eyes classifier
  let eyes = detect_eyes (&face_region,
                          &mut eyes_model)?;
 }
Finally for each detected eye I apply the implemented Timm-Barth algorithm:
if eyes.len () == 2 {
  let left_eye = eyes.get (0)?;
  let left_eye_region = Mat::roi (&face_region, left_eye)?;
  let left_eye_center = timm_barth::find_eye_center (&left_eye_region, left_eye.width)?;

  let right_eye = eyes.get (1)?;
  let right_eye_region = Mat::roi (&face_region, right_eye)?;
  let right_eye_center = timm_barth::find_eye_center (&right_eye_region, right_eye.width)?;
}
The implementation itself can be found in a repository here, and pretty-much follows the reference implementation. The same repository contains the working code, as well as instructions on installing the OpenCV framework (see README).
Here is a video of the algorithm in action:
Thanks for reading!