Adding IPv6 support to your EC2 instance.
Intro

In this blog post we will look into adding IPv6 support to you webapp published on AWS stack. We will assume you are using an EC2 instance running Ubuntu Server 16 and Amazon Route 53 to publish your DNS records. For simplicity we will assume your Amazon VPC (Virtual Private Cloud) has only a public-facing subnet. For the web server we assume Nginx.
At the end you webapp should run dual-stack, supporting traffic both over IPv4 and IPv6.
Associate an IPv6 CIDR Block with your VPC
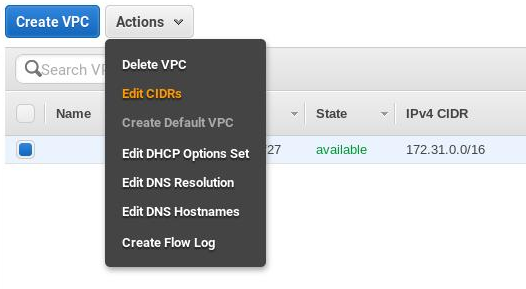
Let’s begin with associating an IPv6 CIDR block with a VPC. Open the VPC console. From the left navigation pane select Your VPCs. In the table select the VPC your instance belongs to (you can check it’s id in EC2 console), click on Actions and select Edit CIDRs:
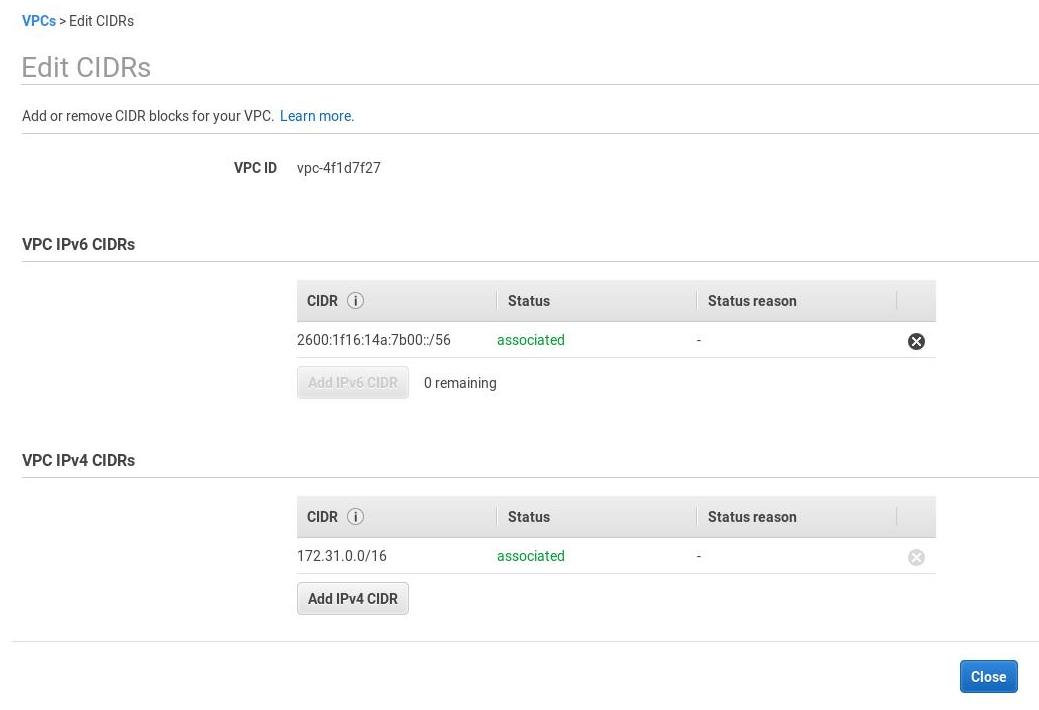
Choose Add IPv6 CIDR and after the IPv6 CIDR block has been added, choose Close:
Associate an IPv6 CIDR block with a subnet
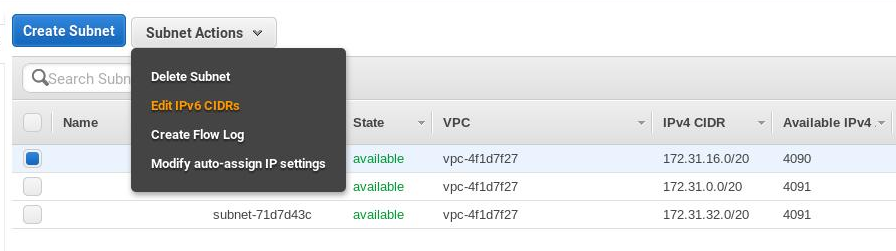
From the left navigation pane select Subnets, choose Subnet Actions and Edit IPv6 CIDRs:
Choose Add IPv6 CIDR and confirm the entry by choosing the tick icon, then Close:
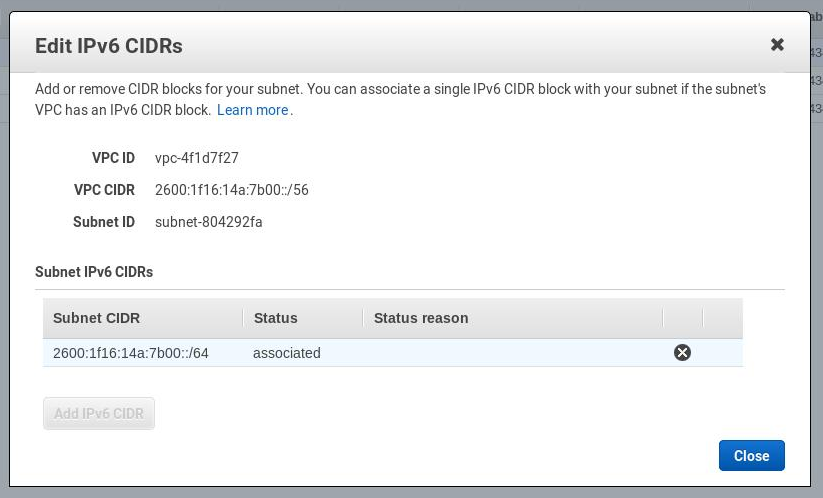
Repeat the steps for the other subnets in your VPC (by default 3).
Update Route Tables
For a public subnet, you must update the route table to enable your EC2 instance to use the internet gateway for IPv6 traffic.
Select Route Tables and select the route table that’s associated with your VPC.
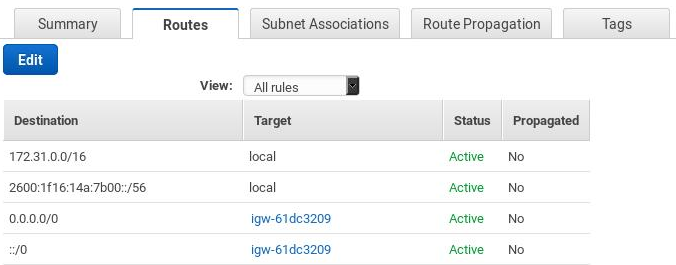
On the Routes tab, choose Edit and Add another route (DO NOT edit an existing IPv4 route).
Specify ::/0 for Destination, select the internet gateway ID (you can check it here) of your VPC for Target, and then click on Save.
In the end you should be able to see something like the following:
Update the Security Group rules
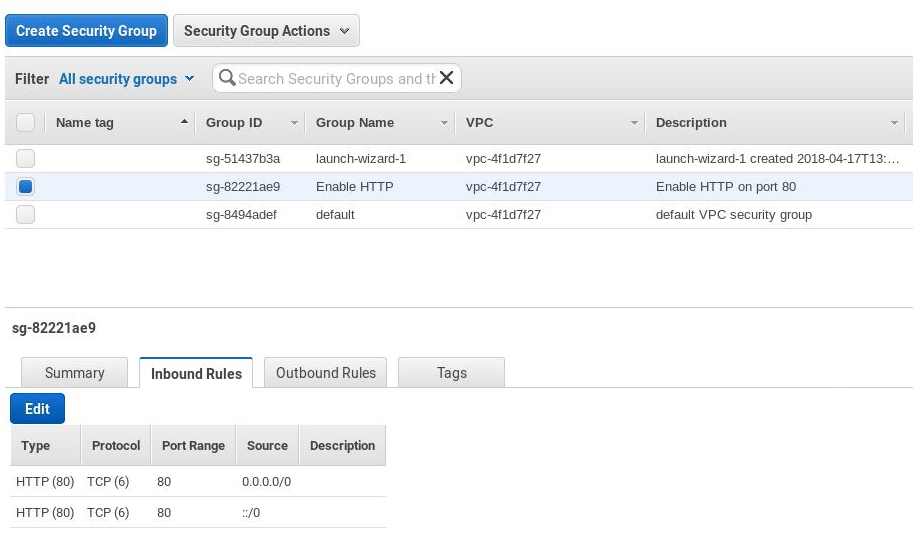
From the navigation pane, choose Security Groups and select one of the security groups your instance belongs to (you can check them in the EC2 console). Typically you will need HTTP, HTTPS and SSH access rules to your instance, which means 3 groups. Select or create one of them (for example a security group for HTTP access):
- In the Inbound Rules tab, choose Edit.
- For Type, select HTTP. For Source, enter
::/0. - If you’re just creating the group also add ipv4 entry with Type: HTTP and Source
0.0.0.0/0.
This is the complete entry you want there:
Repeat these steps creating or editing rules for HTTPS and SSH access per your needs.
Confirm Network ACLs
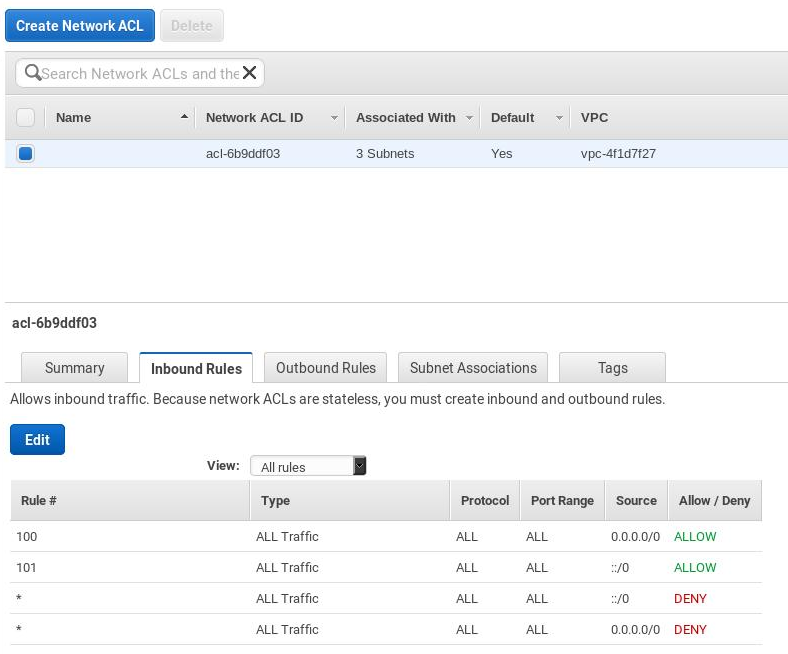
Typically the rules to allow inbound and outbound IPv6 traffic of your subnet are already added to the default network ACL. Confirm you have these rules there:
Assign IPv6 addresses to EC2 instance
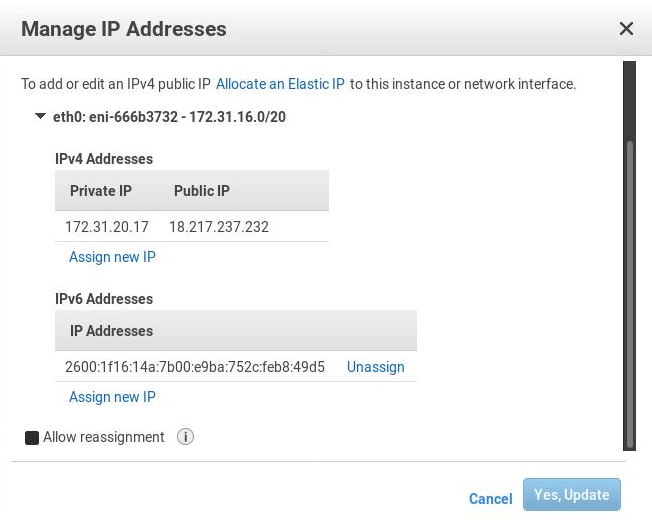
Go to the EC2 console, select Instances, choose your instance, Actions, Networking and select Manage IP Addresses. Under IPv6 Addresses choose Assign new IP, leave Auto-Assign and click on Yes, Update. Confirm the IPv6 assignment and close the window:
Configure your instance to automatically recognize IPv6 address assigned to the network interface
For this steps you need to ssh into your running instance using it’s IPv4 address:
ssh user@ec2-instance
View the contents of the /etc/network/interfaces.d/50-cloud-init.cfg file and confirm that you have there:
$ cat /etc/network/interfaces.d/50-cloud-init.cfg

auto lo
iface lo inet loopback

auto eth0
iface eth0 inet dhcp
Now create the folowing file:
sudo nano /etc/network/interfaces.d/60-default-with-ipv6.cfg
And paste there this content:
iface eth0 inet6 dhcp
If needed replace the network interface of your instance (here eth0) with the correct one (you can check it with ifconfig).
Restart the network interface:
sudo ifdown eth0 ; sudo ifup eth0
Connect again to your instance and use the ifconfig command to verify that the assigned IPv6 address is configured on the network interface:
$ ifconfig | grep Global

inet6 addr: 2600:1f16:14a:7b00:e9ba:752c:feb8:49d5/128 Scope:Global
Publish IPv6 DNS record
Assuming your website is published at the nodrama.io domain you want that name to resolve to the correct IPv6 address of your instance, where in turn your web server can serve the content to the outside world. Amazon Route 53 supports both forward (AAAA) and reverse (PTR) IPv6 records, moreover since recently the Route 53 service itself is available over IPv6.
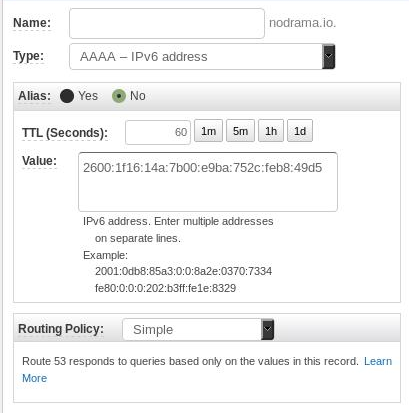
Go to the Route 53 console, click on Hosted zones and select your domain name. Click Create Record Set, and add AAAA record with your domain name and the IPv6 address of you instance:
Dependening on your scenario you hosted zone should now have at the bare minimum these records published:
- IPv4 (A) record for the apex domain (no www or other prefix) pointing to the IPv4 address of your EC2 instance.
- IPv6 (AAAA) record for the apex of your domain pointing to the IPv6 address of your EC2 instance.
- Canonical Name (CNAME) pointing the www subdomain to the apex.
- Name server (NS) record with 4 Amazon Route 53 name servers (your domain registrar should be already changed to use these four Route 53 name servers).
- Start of authority (SOA) record.
Testing and troubleshooting
Let’s confirm that our content is availiable via IPv6 using curl and forcing the GET request over IPv6.
NOTE:
To force IPv6 traffic you need a box with an IPv6 address assigned, which typically boils down to your ISP providing you with it, which is rare these days. Alternatively you can use another EC2 instance with IPv6 address, or as a last resort ping the box the same instance. If you see:
* Immediate connect fail for 2600:1f16:14a:7b00:e9ba:752c:feb8:49d5: Network is unreachable
* Closing connection 0
curl: (7) Couldn't connect to server
Then the box you are trying to connect from does not support IPv6.
Issue this command:
curl -v -6 nodrama.io
If it responds with:
* Connected to nodrama.io (2600:1f16:14a:7b00:e9ba:752c:feb8:49d5) port 80 (#0)
> GET / HTTP/1.1
> Host: nodrama.io
> User-Agent: curl/7.47.0
> Accept: */*
Followed by the content served by Nginx - all is swell. For completeness you can check if the same content is server over IPv4 (curl nodrama.io).
But if the former command returns:
* connect to 2600:1f16:14a:7b00:e9ba:752c:feb8:49d5 port 80 failed: Connection refused
* Failed to connect to district0x.io port 80: Connection refused
* Closing connection 0
curl: (7) Failed to connect to district0x.io port 80: Connection refused
That means nothing is listening on port 80 over IPv6 (alternatively 443 if your content is served over HTTPS). To confirm, connect to the box and list all the ports that are listening:
$ netstat -ntlp | grep LISTEN

(Not all processes could be identified, non-owned process info
 will not be shown, you would have to be root to see it all.)
tcp        0      0 0.0.0.0:80              0.0.0.0:*               LISTEN      -
tcp        0      0 0.0.0.0:22              0.0.0.0:*               LISTEN      -
tcp6       0      0 :::22                   :::*                    LISTEN      -
Looks like there is something listening on port 22 over both IPv4 and IPv6 but on port 80 we only listen to the IPv4 traffic. Let’s list the TCP/IP services that are listening:
$ sudo lsof -iTCP -sTCP:LISTEN -P

COMMAND  PID     USER   FD   TYPE DEVICE SIZE/OFF NODE NAME
sshd    1279     root    3u  IPv4  14769      0t0  TCP *:22 (LISTEN)
sshd    1279     root    4u  IPv6  14771      0t0  TCP *:22 (LISTEN)
nginx   1368     root    6u  IPv4  15743      0t0  TCP *:80 (LISTEN)
nginx   1374 www-data    6u  IPv4  15743      0t0  TCP *:80 (LISTEN)
SSH is availiable on both protocols, courtesy of the ssh daemon, we also confirm our suspicion that Nginx is not listening for the IPv6 traffic on the port 80. Pull up you nginx config:
sudo nano /etc/nginx/sites-available/nodrama.io
Make sure in you server block you listen to both IPv4 and IPv6 (swapping port 80 to 443 if HTTPS encryption is used):
server_name district0x.io;
listen 80;
listen [::]:80 ipv6only=on;
Check the configuration syntax:
sudo nginx -t
and restart the nginx service:
sudo /etc/init.d/nginx restart
Thank you for reading!